“Navigating Your Engine: A Comprehensive Testing Map Sensor Tutorial” – 2023
Introduction
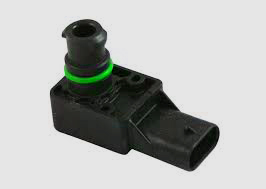
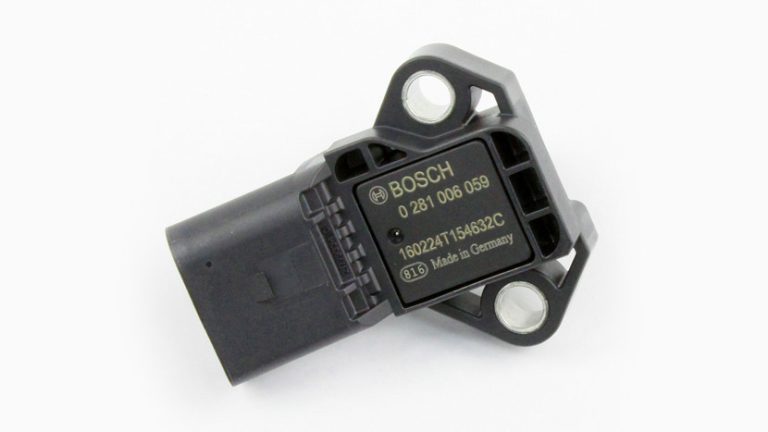
What is a MAP Sensor?
A sensor called the MAP sensor also known as the Manifold Absolute Pressure sensor is a part of the electronic control system, in combustion engines. Its main job is to measure the pressure of the air that enters the engines manifold. This information is then sent to the engine control unit (ECU) which uses it to fine tune fuel injection and ignition timing for optimal engine performance. The importance of MAP sensors in vehicle performance cannot be overstated. By providing data about pressure these sensors enable the ECU to regulate fuel delivery accurately ensuring an optimal air fuel mixture, for combustion. This optimized combustion process leads to increased engine power improved fuel efficiency and reduced emissions.

Understanding the Basics – Testing Map Sensor
The Role of MAP Sensors in Engine Functionality
MAP sensors serve as intermediaries between the engine’s intake manifold and the ECU. They continuously monitor the pressure within the manifold, which is influenced by various factors such as throttle position, engine load, and altitude. This pressure data is converted into an electrical signal that is transmitted to the ECU.
Different Types of Testing Map Sensor
There are two primary types of MAP sensors:
• Absolute Pressure Sensors: These sensors measure the absolute pressure of the air in the intake manifold, taking into account both atmospheric pressure and manifold vacuum. • Gauge Pressure Sensors: These sensors measure the pressure difference between the air in the intake manifold and atmospheric pressure, providing a relative pressure reading.
In modern vehicles, absolute pressure sensors are more commonly used due to their superior accuracy and ability to compensate for altitude changes.

Signs of a Failing MAP Sensor
A malfunctioning MAP sensor can have detrimental effects on engine performance and overall vehicle operation. Here are some telltale signs that may indicate a failing MAP sensor:
Engine Warning Lights and Their Interpretation
The ECU may illuminate the Check Engine Light (CEL) or other warning lights when it detects abnormalities in the MAP sensor’s readings. These lights serve as alerts to potential issues and warrant further inspection.
Performance Issues: From Acceleration to Fuel Efficiency
A faulty MAP sensor can manifest in various performance issues, including:
• Sluggish Acceleration: Erroneous MAP sensor readings can cause the ECU to miscalculate fuel injection, leading to hesitation or sluggish acceleration.
• Uneven Idle: Inconsistent MAP readings can disrupt the engine’s idle speed, causing it to fluctuate or stall.
• Reduced Fuel Efficiency: Improper fuel injection due to faulty MAP sensor data can lead to increased fuel consumption and reduced fuel economy.
• Black Smoke from Exhaust: Incomplete combustion caused by inaccurate fuel-air mixture can produce excessive black smoke from the exhaust. If you experience any of these performance issues, it is advisable to have your vehicle’s MAP sensor checked by a qualified mechanic to ensure optimal engine operation and vehicle performance.
Tools You’ll Need in Testing Map Sensor
Essential Tools for Accurate Testing Map Sensor
To have a accurate Testing Map Sensor, you’ll need a few essential tools:
• Digital Multimeter: This versatile tool measures voltage, resistance, and current, allowing you to assess the electrical integrity of the MAP sensor and its associated circuitry.
• Vacuum Pump or Gauge: A vacuum pump or gauge is used to create a controlled vacuum environment to simulate different engine load conditions and evaluate the MAP sensor’s response.
• Scan Tool or OBD-II Reader: These tools can extract diagnostic trouble codes (DTCs) stored in the ECU, providing valuable insights into potential issues with the MAP sensor or other engine components.
• Service Manual or Repair Guide: Consult your vehicle’s specific service manual or repair guide to identify the exact location of the MAP sensor, its electrical connector pinout, and reference voltage values.
How to Use Diagnostic Equipment Effectively
Proper use of diagnostic equipment is crucial for accurate testing and interpretation of results. Here are some key pointers:
• Follow Manufacturer Instructions: Always adhere to the manufacturer’s instructions for your specific multimeter, vacuum pump, scan tool, or OBD-II reader.
• Ensure Proper Connections: Make sure all connections are secure and free of corrosion or damage to prevent false readings or potential short circuits.
• Ground Reference: When using a multimeter, ensure the ground lead is connected to a proper ground point on the vehicle’s chassis.
• Voltage and Resistance Ranges: Select the appropriate voltage and resistance ranges on your multimeter to obtain accurate readings.
• Interpreting Data: Carefully interpret the voltage, resistance, and waveform readings obtained during testing to assess the MAP sensor’s condition.
Preparing for Testing Map Sensor
Safety Measures: Ensuring a Risk-Free Environment
Before embarking on MAP sensor testing, it’s essential to prioritize safety:
• Work in a Well-Ventilated Area: Choose a well-ventilated workspace to avoid exposure to potential fumes or exhaust gases.
• Secure the Vehicle: Park the vehicle on a level surface and engage the parking brake to prevent accidental movement.
• Disconnect the Battery: Disconnect the negative battery terminal to prevent accidental electrical shorts or sparks.
• Wear Protective Gear: Use appropriate protective gear, such as gloves and safety glasses, to safeguard yourself from potential hazards.
Identifying the Location of the Map Sensor in Your Vehicle
The exact location of the MAP sensor varies depending on the vehicle make and model. Consult your vehicle’s service manual or repair guide to locate the sensor accurately. It is typically mounted on the intake manifold, near the throttle body or air intake tube.
Step-by-Step Testing Map Sensor Procedures
Initial Checks: Wires, Connections, and Visual Inspection
Before delving into electrical testing, conduct a thorough visual inspection of the MAP sensor and its associated wiring:
• Inspect the Wiring: Check for any frayed, damaged, or loose wires that could affect sensor performance.
• Examine the Connector: Ensure the electrical connector is securely plugged into the MAP sensor and free of corrosion or debris.
• Visual Inspection of the Sensor: Check for any physical damage, cracks, or contaminants on the MAP sensor itself.
Utilizing Multimeters for Voltage and Resistance Checks
With initial checks complete, proceed to electrical testing using a multimeter:
• Measuring Voltage: Connect the multimeter’s black lead to a suitable ground point and the red lead to the MAP sensor’s signal wire. Check the voltage reading against the specified reference value in your vehicle’s service manual.
• Resistance Testing: Disconnect the MAP sensor from its electrical connector. Measure the resistance between the signal and ground pins using the multimeter. Compare the reading to the manufacturer’s specified resistance range.
Interpreting Readings: What the Numbers Tell You
The voltage and resistance readings obtained during testing provide valuable clues about the MAP sensor’s condition:
• Voltage Out of Range: Abnormal voltage readings indicate a potential problem with the sensor’s power supply or internal circuitry.
• High Resistance: Excessive resistance suggests a faulty connection or internal damage to the sensor’s wiring or circuit.
Advanced Testing Techniques
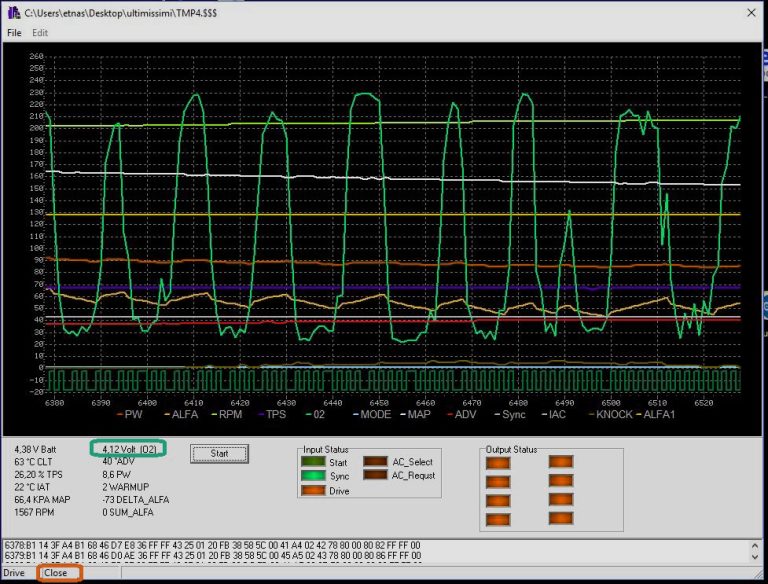
Oscilloscope Applications: Analyzing Waveforms
An oscilloscope provides a more in-depth analysis of the MAP sensor’s electrical signal:
• Waveform Pattern: Observe the waveform pattern on the oscilloscope’s screen. A healthy MAP sensor should produce a smooth, consistent waveform.
• Frequency and Amplitude: Evaluate the waveform’s frequency and amplitude, comparing them to the manufacturer’s specified values.
Common Misconceptions
Debunking Myths Surrounding Testing Map Sensor
Several misconceptions persist regarding MAP sensor testing, which can lead to inaccurate diagnoses and unnecessary repairs. Here are some common myths to dispel:
• Myth 1: MAP sensor problems always trigger the Check Engine Light: While the CEL may illuminate in some cases of MAP sensor failure, it may not always be activated, especially for minor sensor issues.
• Myth 2: Cleaning the MAP sensor can always fix performance problems: Cleaning the MAP sensor can sometimes address minor issues caused by contamination, but it may not resolve underlying electrical or mechanical faults.
• Myth 3: Replacing the MAP sensor is always the solution: Malfunctioning MAP sensors can indeed cause performance issues, but other components, such as vacuum leaks or ignition problems, can mimic MAP sensor symptoms.
• Myth 4: DIY testing is always reliable: While DIY testing can provide valuable insights, misinterpretation of results or improper testing procedures can lead to inaccurate conclusions.
Avoiding Pitfalls: Common Errors in DIY Testing
To avoid common pitfalls in DIY MAP sensor testing, follow these guidelines:
• Use Proper Tools: Ensure you have the necessary tools, such as a multimeter, vacuum pump, and scan tool, and operate them correctly.
• Consult Service Manual: Refer to the vehicle’s service manual for specific instructions on MAP sensor location, testing procedures, and reference values.
• Seek Professional Assistance: If you encounter difficulties or lack the expertise, seek assistance from a qualified mechanic for proper diagnosis and repair.
• Interpret Results Cautiously: Don’t jump to conclusions based on isolated test results. Consider the vehicle’s overall symptoms and other potential causes before making any repairs.
Conclusion
MAP sensors play a role, in optimizing engine performance and ensuring fuel combustion. They accurately measure the air pressure entering the manifold providing information to the ECU for precise fuel injection and ignition timing. To test a MAP sensor it’s important to perform an inspection conduct checks using a multimeter and utilize advanced techniques like waveform analysis. Properly interpreting the test results and considering causes are crucial for accurate diagnosis and repair. While DIY MAP sensor testing can offer insights it is recommended to seek assistance from a qualified mechanic, for comprehensive diagnosis and repair. This will ensure your vehicle maintains performance.
FAQs
Can I clean my MAP sensor to fix performance issues?
Cleaning the MAP sensor can sometimes resolve performance issues caused by minor contamination, but it may not address underlying electrical or mechanical faults. If you suspect a dirty MAP sensor, consult your vehicle’s service manual for proper cleaning procedures.
How frequently would it be advisable for me to replace my Map sensor?
MAP sensors generally have a long lifespan and rarely require replacement unless they fail or experience damage. However, if you notice any performance issues related to air-fuel mixture or engine control, it’s advisable to have your MAP sensor tested by a qualified mechanic.
What are some symptoms of a failing MAP sensor?
Symptoms of a failing MAP sensor can include:
• Engine hesitation or sluggish acceleration
• Uneven idle or stalling
• Reduced fuel economy
• Increased black smoke from the exhaust
• Check Engine Light illumination
Can I test my MAP sensor using a simple multimeter?
Yes, you can perform basic voltage and resistance checks on a MAP sensor using a multimeter. However, for more in-depth analysis and waveform evaluation, an oscilloscope is recommended.
Is it always necessary to replace a faulty MAP sensor?
Not always. In some cases, cleaning or repairing the sensor may be sufficient. However, if the sensor is severely damaged or malfunctions persistently, replacement is usually necessary.