How to Test the Camshaft Position Sensor on a Jeep 4.0 Engine? By Sensor Guides
As an experienced mechanic, I know that a faulty camshaft position sensor can cause a variety of problems in a Jeep 4.0 engine. If you are experiencing engine misfires, decreased fuel efficiency, difficulty starting the engine, or have a check engine light on, it may be time to test the camshaft position sensor.
In this article, I’ll outline the steps you need to follow to test the sensor and make any necessary repairs.
Table of Contents
Symptoms of a Faulty Camshaft Position Sensor
Before testing the camshaft position sensor, it’s important to know the symptoms of a faulty sensor. Here are some common signs that the camshaft position sensor in your Jeep 4.0 engine may be failing:
Engine Misfires or Stalls
If your engine is misfiring or stalling, it could be a sign that the camshaft position sensor is not functioning properly. The sensor provides critical information to the engine control module (ECM), which uses that information to adjust the fuel injection and ignition timing.
Decreased Fuel Efficiency
A faulty camshaft position sensor can cause the engine to run inefficiently, which can lead to decreased fuel efficiency. This can result in higher fuel costs and may also contribute to other problems, such as increased emissions.
Difficulty Starting the Engine
If you are having trouble starting your Jeep 4.0 engine, it could be due to a faulty camshaft position sensor. The sensor helps the ECM determine the correct timing for the ignition and fuel injection, so the engine may not start at all if it is not functioning properly.
Check Engine Light On
Finally, if the check engine light is on in your Jeep 4.0, it could be a sign that the camshaft position sensor is not working correctly. The ECM uses the sensor to monitor the engine’s operation, so if the sensor has a problem, the ECM will often trigger the check engine light.
Tools and Equipment Needed for Testing
To test the camshaft position sensor on a Jeep 4.0 engine, you will need the following tools and equipment:
- Digital Multimeter
A digital multimeter is essential for testing the camshaft position sensor. It will allow you to measure the sensor’s voltage output and determine whether it is functioning correctly.
- Back Probe Kit
You’ll also need a back probe kit to connect the multimeter to the wiring harness. This kit will allow you to access the signal wire from the camshaft position sensor.
- Wiring Diagram of the Camshaft Position Sensor Circuit
It’s important to have a wiring diagram of the camshaft position sensor circuit for your Jeep 4.0 engine. This will help you identify which wire is the signal wire and where it connects to the ECM.
- Jeep 4.0 Engine Service Manual
Finally, you’ll need a service manual for your Jeep 4.0 engine. This manual will provide detailed instructions on locating and testing the camshaft position sensor.
Steps to Test the Camshaft Position Sensor
Now that you have the tools and equipment you need, here are the steps you need to follow to test the camshaft position sensor:
Step 1: Locate the Camshaft Position Sensor
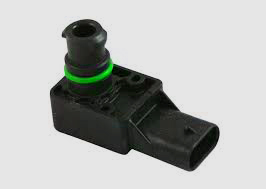
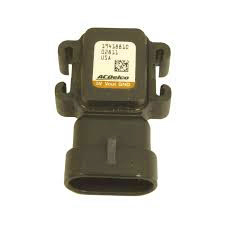
The camshaft position sensor is located on the passenger side of the engine block, just above the starter motor. It is a small, cylindrical device with an electrical connector.
Step 2: Disconnect the Electrical Connector
You’ll need to disconnect the electrical connector to test the camshaft position sensor. This will allow you to access the signal wire and connect the multimeter.
Step 03: Connect the Back Probe Kit and Multimeter
Connect the multimeter to the signal wire from the camshaft position sensor using the back probe kit. The signal wire is usually the center wire in the connector.
Step 4: Set the Multimeter to AC Voltage
Set the multimeter to AC voltage and start the engine. The voltage output from the camshaft position sensor should be between 0.5 and 5 volts AC. If the voltage is outside of this range, the sensor may be faulty.
Step 5: Check for Signal Interruptions
While the engine is running, wiggle the wiring harness and connector to check for signal interruptions. If the voltage reading fluctuates or drops to zero, this may indicate a wiring or connector problem.
Step 6: Inspect the Sensor and Wiring Harness
If you suspect a faulty camshaft position sensor, inspect the sensor and wiring harness for any damage or wear. Look for broken wires, corroded terminals, or signs of physical damage to the sensor.
Step 7: Replace the Camshaft Position Sensor
If the camshaft position sensor is found to be faulty, it should be replaced. Remove the old sensor and install the new one, making sure to torque the retaining bolt to the manufacturer’s specifications. Reconnect the electrical connector and clear any diagnostic trouble codes from the ECM.
Conclusion
Testing the camshaft position sensor on a Jeep 4.0 engine is a relatively simple process that can help diagnose and solve a variety of engine problems. By following the steps outlined in this article, you can quickly and easily test the sensor and make any necessary repairs. Remember always to consult your Jeep 4.0 engine service manual and take the necessary safety precautions when working on your vehicle.