6.7 Cummins Sensor Locations, Symptoms and Replacement Procedure Explained
Discovering the sensor locations, symptoms of sensor issues, and replacement procedures in a 6.7 Cummins engine is essential for maintaining its performance and reliability. This article delves into the world of 6.7 Cummins sensors, shedding light on where they are situated, the telltale signs of sensor problems, and the step-by-step process to replace them. Whether you’re a DIY enthusiast or looking to stay informed about your vehicle’s health, this guide has you covered.
Table of Contents
What are 6.7 Cummins Sensor Locations and symptoms?

Ambient Air Temperature Sensor in a 6.7 Cummins
The Ambient Air Temperature Sensor in a 6.7 Cummins engine is typically located behind the front grille or bumper, near the front of the vehicle. It is exposed to the outside air to measure the ambient temperature accurately.
Accessing the sensor often involves removing the front grille or bumper cover to reach the sensor’s location. Depending on your vehicle’s make and model, additional components may need to be removed for clear access.
- Symptoms of Issues:
- Inaccurate Temperature Readings: A malfunctioning ambient air temperature sensor may provide inaccurate temperature readings on the vehicle’s display or climate control system.
- Erratic Climate Control: Incorrect ambient temperature readings can affect the automatic climate control system’s performance, leading to uncomfortable cabin conditions.
- Warning Lights: In some cases, a faulty sensor may trigger warning lights on the dashboard.
- Replacement Procedure:
- Ensure the engine is off, and the vehicle is cool.
- Locate the sensor behind the grille or bumper.
- Disconnect the electrical connector from the sensor.
- Remove any retaining clips or fasteners securing the sensor in place.
- Carefully extract the old sensor from its location.
- Install the new ambient air temperature sensor in the same location.
- Secure it with retaining clips or fasteners.
- Reconnect the electrical connector.
- Reassemble any components, such as the grille or bumper cover, that were removed to access the sensor.
- Start the engine and verify that the ambient temperature readings are accurate.
Please note that specific steps and access methods can vary depending on your vehicle’s make and model. Always consult your vehicle’s service manual for precise instructions tailored to your Cummins engine model.
Barometric Pressure Sensor in a 6.7 Cummins
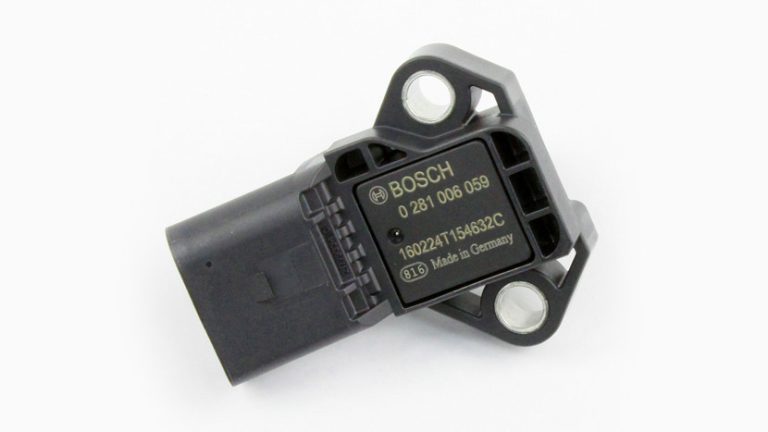
The Barometric Pressure Sensor in a 6.7 Cummins engine is typically located on or near the intake manifold. It may be situated on the engine’s intake manifold itself or on the air intake tubing leading to the manifold.
Accessing the sensor usually requires removing any engine covers or components that obstruct access to the intake manifold area. You may need to disconnect air intake components to reach the sensor.
- Symptoms of Issues:
- Poor Engine Performance: A malfunctioning barometric pressure sensor can lead to poor engine performance, including reduced power and efficiency.
- Incorrect Altitude Compensation: The sensor plays a crucial role in adjusting fuel and air mixture for optimal combustion at different altitudes. Malfunctions can lead to problems at higher elevations.
- Check Engine Light: Sensor issues may trigger the check engine light to illuminate on the dashboard.
- Replacement Procedure:
- Turn off the engine and allow it to cool.
- Locate the barometric pressure sensor on or near the intake manifold.
- Carefully disconnect the electrical connector from the sensor.
- Depending on the mounting type, remove any retaining clips, bolts, or fasteners securing the sensor.
- Gently extract the old sensor from its location.
- Install the new barometric pressure sensor in the same location.
- Secure it with retaining clips, bolts, or fasteners.
- Reconnect the electrical connector.
- Reassemble any components, such as engine covers or air intake components, that were removed for access.
- Start the engine and ensure it runs smoothly, and the check engine light is off.
Always refer to your vehicle’s service manual for specific instructions tailored to your Cummins engine model, as sensor locations and access methods can vary among different vehicle models.
Boost Pressure Sensor in a 6.7 Cummins
The Boost Pressure Sensor in a 6.7 Cummins engine is typically located on or near the intake manifold or the intercooler. Its placement may vary depending on the vehicle’s specific configuration.
Accessing the boost pressure sensor usually requires removing any components that obstruct access to the intake manifold or intercooler area. This may involve disconnecting air intake components or removing engine covers.
- Symptoms of Issues:
- Loss of Power: A malfunctioning boost pressure sensor can result in a loss of engine power, especially during acceleration.
- Reduced Fuel Efficiency: Incorrect sensor readings can lead to poor fuel efficiency as the engine may not optimize the air-fuel mixture.
- Check Engine Light: Sensor problems may trigger the check engine light on the dashboard.
- Turbocharger Issues: Since the boost pressure sensor is closely related to turbocharger operation, issues with the sensor can impact the turbocharger’s performance.
- Replacement Procedure:
- Turn off the engine and let it cool.
- Locate the boost pressure sensor on or near the intake manifold or intercooler.
- Carefully disconnect the electrical connector from the sensor.
- Depending on the mounting type, remove any retaining clips, bolts, or fasteners securing the sensor.
- Gently extract the old sensor from its location.
- Install the new boost pressure sensor in the same location.
- Secure it with retaining clips, bolts, or fasteners.
- Reconnect the electrical connector.
- Reassemble any components, such as engine covers or air intake components, that were removed for access.
- Start the engine and check for proper performance. Ensure there are no warning lights on the dashboard.
Please refer to your vehicle’s service manual for precise instructions tailored to your Cummins engine model, as sensor locations and access methods can vary among different vehicle models.
Crankshaft Position Sensor in a 6.7 Cummins
The Crankshaft Position Sensor in a 6.7 Cummins engine is typically situated near the crankshaft at the front of the engine or on the transmission bell housing.
Accessing the crankshaft position sensor often requires removing any components that obstruct access to the sensor’s location. Depending on the vehicle’s configuration, you may need to access it from underneath the vehicle or by removing engine covers.
- Symptoms of Issues:
- Engine Stalling: A malfunctioning crankshaft position sensor can lead to engine stalling, especially during idling or low-speed operation.
- Hard Starting: Starting the engine may become difficult, and it may take multiple attempts to get the engine running.
- Poor Performance: Incorrect sensor readings can result in poor engine performance, including misfires and reduced power.
- Check Engine Light: Sensor issues can trigger the check engine light on the dashboard.
- Replacement Procedure:
- Turn off the engine and allow it to cool.
- Locate the crankshaft position sensor near the crankshaft or transmission bell housing.
- Carefully disconnect the electrical connector from the sensor.
- Depending on the mounting type, remove any retaining clips, bolts, or fasteners securing the sensor.
- Gently extract the old sensor from its location.
- Install the new crankshaft position sensor in the same location.
- Secure it with retaining clips, bolts, or fasteners.
- Reconnect the electrical connector.
- Reassemble any components, such as engine covers, that were removed for access.
- Start the engine and ensure it runs smoothly. Check for proper performance and the absence of warning lights.
Please consult your vehicle’s service manual for specific instructions tailored to your Cummins engine model, as sensor locations and access methods can vary among different vehicle models.
Camshaft Position Sensor in a 6.7 Cummins
- Location: The Camshaft Position Sensor in a 6.7 Cummins engine is typically located near the camshaft or on the front of the engine. The exact placement can vary based on the vehicle’s configuration.
- Access: Accessing the camshaft position sensor often requires removing components that obstruct access to the sensor’s location. This may involve removing engine covers or other parts to reach the sensor.
- Symptoms of Issues:
- Hard Starting: A malfunctioning camshaft position sensor can result in difficult engine starting, requiring multiple attempts.
- Engine Stalling: The engine may stall or hesitate during operation due to incorrect sensor readings.
- Poor Performance: Incorrect timing information from the sensor can lead to poor engine performance, including misfires and reduced power.
- Check Engine Light: Sensor problems can trigger the check engine light on the dashboard.
- Replacement Procedure:
- Turn off the engine and allow it to cool.
- Locate the camshaft position sensor near the camshaft or on the front of the engine.
- Carefully disconnect the electrical connector from the sensor.
- Depending on the mounting type, remove any retaining clips, bolts, or fasteners securing the sensor.
- Gently extract the old sensor from its location.
- Install the new camshaft position sensor in the same location.
- Secure it with retaining clips, bolts, or fasteners.
- Reconnect the electrical connector.
- Reassemble any components, such as engine covers, that were removed for access.
- Start the engine and ensure it runs smoothly. Check for proper performance and the absence of warning lights.
Please consult your vehicle’s service manual for specific instructions tailored to your Cummins engine model, as sensor locations and access methods can vary among different vehicle models.
Exhaust Gas Temperature (EGT) Sensor in a 6.7 Cummins
The Exhaust Gas Temperature (EGT) Sensor in a 6.7 Cummins engine is typically located in the exhaust system, usually either before or after the turbocharger or in the exhaust manifold.
Accessing the EGT sensor may require crawling underneath the vehicle or accessing it from the engine bay. Depending on the specific vehicle model, you may need to remove heat shields or other components to reach the sensor.
- Symptoms of Issues:
- Reduced Performance: A malfunctioning EGT sensor can lead to reduced engine performance, including decreased power and fuel efficiency.
- Overheating: Incorrect EGT readings can result in engine overheating, which can lead to damage if not addressed.
- Check Engine Light: Sensor issues can trigger the check engine light on the dashboard.
- Turbocharger Problems: As EGT plays a role in turbocharger management, sensor problems can impact turbocharger performance.
- Replacement Procedure:
- Turn off the engine and let it cool.
- Locate the EGT sensor in the exhaust system.
- Carefully disconnect the electrical connector from the sensor.
- Depending on the mounting type, remove any retaining clips, bolts, or fasteners securing the sensor.
- Gently extract the old EGT sensor from its location.
- Install the new EGT sensor in the same location.
- Secure it with retaining clips, bolts, or fasteners.
- Reconnect the electrical connector.
- Reassemble any components, such as heat shields or other parts, that were removed for access.
- Start the engine and ensure it runs smoothly. Check for proper performance and the absence of warning lights.
Remember to consult your vehicle’s service manual for specific instructions tailored to your Cummins engine model, as sensor locations and access methods can vary among different vehicle models.
Fuel Pressure Sensor in a 6.7 Cummins
The Fuel Pressure Sensor in a 6.7 Cummins engine is typically located on or near the fuel rail or fuel delivery system.
Accessing the fuel pressure sensor may require removing any components or covers that obstruct access to the sensor’s location. Depending on the vehicle’s configuration, this could involve accessing it from the engine bay or underneath the vehicle.
- Symptoms of Issues:
- Poor Engine Performance: A malfunctioning fuel pressure sensor can lead to poor engine performance, including reduced power and fuel efficiency.
- Hard Starting: Starting the engine may become difficult, and it may take multiple attempts.
- Check Engine Light: Sensor issues can trigger the check engine light on the dashboard.
- Fuel System Problems: Fuel pressure sensor problems can lead to issues with the fuel delivery system.
- Replacement Procedure:
- Turn off the engine and let it cool.
- Locate the fuel pressure sensor on or near the fuel rail or fuel delivery system.
- Carefully disconnect the electrical connector from the sensor.
- Depending on the mounting type, remove any retaining clips, bolts, or fasteners securing the sensor.
- Gently extract the old fuel pressure sensor from its location.
- Install the new fuel pressure sensor in the same location.
- Secure it with retaining clips, bolts, or fasteners.
- Reconnect the electrical connector.
- Reassemble any components, such as covers or parts, that were removed for access.
- Start the engine and ensure it runs smoothly. Check for proper performance and the absence of warning lights.
Please consult your vehicle’s service manual for specific instructions tailored to your Cummins engine model, as sensor locations and access methods can vary among different vehicle models.
Intake Air Temperature (IAT) Sensor in a 6.7 Cummins
The Intake Air Temperature (IAT) Sensor in a 6.7 Cummins engine is typically located in the air intake system, often near the air filter housing or the intake manifold.
Accessing the IAT sensor may involve removing air intake components or covers that obstruct access to the sensor’s location. It is usually accessible from the engine bay.
- Symptoms of Issues:
- Reduced Engine Performance: A malfunctioning IAT sensor can lead to reduced engine performance, including decreased power and fuel efficiency.
- Hard Starting: Starting the engine may become difficult, and it may take multiple attempts.
- Check Engine Light: Sensor problems can trigger the check engine light on the dashboard.
- Incorrect Air-Fuel Mixture: Incorrect IAT readings can lead to an incorrect air-fuel mixture, impacting engine operation.
- Replacement Procedure:
- Turn off the engine and let it cool.
- Locate the IAT sensor in the air intake system, near the air filter housing or intake manifold.
- Carefully disconnect the electrical connector from the sensor.
- Depending on the mounting type, remove any retaining clips, bolts, or fasteners securing the sensor.
- Gently extract the old IAT sensor from its location.
- Install the new IAT sensor in the same location.
- Secure it with retaining clips, bolts, or fasteners.
- Reconnect the electrical connector.
- Reassemble any components, such as air intake components or covers, that were removed for access.
- Start the engine and ensure it runs smoothly. Check for proper performance and the absence of warning lights.
Please consult your vehicle’s service manual for specific instructions tailored to your Cummins engine model, as sensor locations and access methods can vary among different vehicle models.
Mass Air Flow (MAF) Sensor in a 6.7 Cummins
The Mass Air Flow (MAF) Sensor in a 6.7 Cummins engine is typically located in the air intake system, usually before the throttle body and after the air filter housing.
Accessing the MAF sensor may require removing air intake components or covers that obstruct access to the sensor’s location. It is usually accessible from the engine bay.
- Symptoms of Issues:
- Poor Engine Performance: A malfunctioning MAF sensor can lead to poor engine performance, including reduced power and fuel efficiency.
- Hard Starting: Starting the engine may become difficult, and it may take multiple attempts.
- Check Engine Light: Sensor problems can trigger the check engine light on the dashboard.
- Incorrect Air-Fuel Mixture: Incorrect MAF readings can lead to an incorrect air-fuel mixture, impacting engine operation.
- Replacement Procedure:
- Turn off the engine and let it cool.
- Locate the MAF sensor in the air intake system, often before the throttle body.
- Carefully disconnect the electrical connector from the sensor.
- Depending on the mounting type, remove any retaining clips, bolts, or fasteners securing the sensor.
- Gently extract the old MAF sensor from its location.
- Install the new MAF sensor in the same location.
- Secure it with retaining clips, bolts, or fasteners.
- Reconnect the electrical connector.
- Reassemble any components, such as air intake components or covers, that were removed for access.
- Start the engine and ensure it runs smoothly. Check for proper performance and the absence of warning lights.
Please consult your vehicle’s service manual for specific instructions tailored to your Cummins engine model, as sensor locations and access methods can vary among different vehicle models.
Oxygen Sensor in a 6.7 Cummins
A 6.7 Cummins engine typically has multiple oxygen sensors. They are generally located in the exhaust system, both before and after the catalytic converter(s). There are usually at least two, often referred to as the “upstream” and “downstream” sensors.
Accessing the oxygen sensors usually requires getting underneath the vehicle. They are threaded into the exhaust pipes or catalytic converter, and access can vary depending on the specific vehicle model.
- Symptoms of Issues:
- Poor Fuel Efficiency: A malfunctioning oxygen sensor can lead to poor fuel efficiency.
- Reduced Engine Performance: Incorrect oxygen sensor readings can result in decreased engine performance.
- Check Engine Light: Sensor problems can trigger the check engine light on the dashboard.
- Emissions Issues: Faulty oxygen sensors can lead to increased emissions and may cause a vehicle to fail emissions tests.
- Replacement Procedure:
- Turn off the engine and let it cool.
- Locate the oxygen sensor(s) in the exhaust system, both upstream and downstream of the catalytic converter(s).
- Carefully disconnect the electrical connector from the sensor.
- Use an appropriate oxygen sensor socket or wrench to loosen and remove the old sensor.
- Install the new oxygen sensor in the same location, threading it into the exhaust pipe or catalytic converter.
- Tighten the sensor to the manufacturer’s specified torque.
- Reconnect the electrical connector.
- Repeat the above steps for any other oxygen sensors that need replacement.
- Start the engine and ensure it runs smoothly. Check for proper performance and the absence of warning lights.
Consult your vehicle’s service manual for specific instructions tailored to your Cummins engine model, as the number and locations of oxygen sensors can vary among different vehicle models.
Throttle Position Sensor (TPS) in a 6.7 Cummins
The Throttle Position Sensor (TPS) in a 6.7 Cummins engine is usually located on the throttle body. The throttle body is connected to the air intake system and is responsible for controlling the amount of air that enters the engine.
Accessing the TPS typically involves locating and reaching the throttle body, which is usually accessible from the engine bay.
- Symptoms of Issues:
- Poor Acceleration: A malfunctioning TPS can lead to poor acceleration and throttle response.
- Stalling: The engine may stall when idling or during deceleration if the TPS is not functioning correctly.
- Check Engine Light: TPS problems can trigger the check engine light on the dashboard.
- Erratic Idle: An irregular or fluctuating engine idle speed can be a sign of TPS issues.
- Replacement Procedure:
- Turn off the engine and let it cool.
- Locate the throttle body on the engine.
- Carefully disconnect the electrical connector from the TPS.
- Depending on the mounting type, remove any retaining clips, bolts, or fasteners securing the TPS to the throttle body.
- Gently remove the old TPS from the throttle body.
- Install the new TPS in the same location on the throttle body.
- Secure it with retaining clips, bolts, or fasteners.
- Reconnect the electrical connector.
- Start the engine and ensure it runs smoothly. Check for proper acceleration and throttle response.
Please consult your vehicle’s service manual for specific instructions tailored to your Cummins engine model, as sensor locations and access methods can vary among different vehicle models.
What to do ro keep your 6.7 Cummins Sensors well functioned?
To maintain the proper functioning of sensors in a 6.7 Cummins engine, follow these guidelines:
- Regular Maintenance: Adhere to the manufacturer’s recommended maintenance schedule, including oil changes, air filter replacements, and overall engine servicing.
- Quality Fuel and Oil: Use high-quality fuel and engine oil to minimize contaminants that could affect sensor performance.
- Avoid Excessive Idling: Prolonged idling can lead to sensor fouling. Turn off the engine when not in use.
- Clean Air Intake: Keep the air intake system clean to prevent debris from reaching sensors.
- Check for Leaks: Regularly inspect for oil or fluid leaks that could contaminate sensors.
- Avoid Harsh Driving: Aggressive driving can strain sensors. Drive smoothly and avoid sudden accelerations or decelerations.
- Use Quality Parts: When replacing sensors, use genuine or high-quality aftermarket parts.
By following these practices, you can help ensure that the sensors in your 6.7 Cummins engine remain in good working condition.