MAP Sensor Trick: 3 Methods Explained
The MAP sensor trick has gained popularity when improving vehicle performance and fuel efficiency. But what is it, and how can it be done safely and effectively? This comprehensive guide will explore the ins and outs of the MAP sensor trick, covering methods such as resistor installation, cold air intake systems, and tuning devices.
We’ll walk you through the steps and considerations to ensure you make informed decisions that benefit your vehicle, all while avoiding potential pitfalls.
Table of Contents
What does the MAP sensor do?
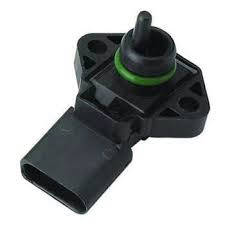
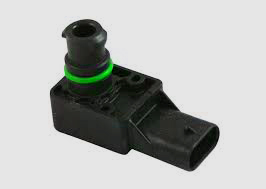
The MAP (Manifold Absolute Pressure) sensor is critical to a vehicle’s engine management system. Its primary function is to measure the pressure and temperature of the air entering the engine’s intake manifold. This information is then relayed to the Engine Control Unit (ECU), which is essentially the vehicle’s onboard computer.
The ECU uses the data from the MAP sensor to make real-time adjustments to the air-fuel mixture in the engine. These adjustments are vital for ensuring the engine operates at peak efficiency and performance.
By continuously monitoring the pressure and temperature of the incoming air, the MAP sensor helps the ECU calculate the correct amount of fuel to inject into the engine for combustion.
What are the pros and cons of tricking a MAP sensor?
Tricking a MAP (Manifold Absolute Pressure) sensor can have both advantages and disadvantages, and it’s essential to weigh the pros and cons before considering this modification.
Pros of Tricking a MAP Sensor:
- Potential Performance Improvement: By altering the MAP sensor data, you may be able to increase engine power and torque, resulting in improved vehicle performance. This can be particularly appealing for automotive enthusiasts.
- Fuel Efficiency Enhancement: Some modifications can lead to better fuel economy by optimizing the air-fuel mixture, which could result in cost savings over time.
- Customization: Tricking a MAP sensor allows you to tailor your vehicle’s performance to your preferences. You can fine-tune it to suit your driving style and needs.
Cons of Tricking a MAP Sensor:
- Engine Damage: Incorrectly altering the MAP sensor data or using the wrong methods can lead to engine damage, including knocking, overheating, and premature wear and tear.
- Warranty Voidance: Modifying your vehicle’s MAP sensor can void your warranty. If any issues arise and the manufacturer detects the modification, repairs may not be covered under warranty.
- Emissions and Environmental Impact: Tweaking the air-fuel mixture can lead to increased emissions, potentially contributing to air pollution. It’s essential to consider the environmental impact of these modifications.
- Legal Issues: Some regions have strict regulations regarding vehicle emissions and modifications. Tricking a MAP sensor could lead to legal issues or fines if your vehicle no longer complies with local emissions standards.
- Risk of Poor Performance: If not done correctly, altering the MAP sensor can lead to a decrease in performance, fuel efficiency, and drivability, which can be counterproductive.
In summary, while tricking a MAP sensor may offer benefits in terms of performance and fuel economy, it comes with risks that should not be underestimated. It’s crucial to conduct thorough research, consult with experts, and consider the potential consequences, including engine damage and warranty issues, before deciding to modify your vehicle’s MAP sensor.
If you’re not experienced in this area, it’s typically best to have any adjustments made by qualified professionals who can ensure safe and effective modifications.
How to Trick a MAP Sensor? 3 Methods Explained
Method 1: Resistor Installation
Installing a resistor in the MAP sensor circuit reduces the voltage signal sent to the ECU. This makes the ECU believe that less air is entering the engine, causing it to inject more fuel, potentially improving performance and fuel economy.
Effective Resistor Installation:
- Choose the Correct Resistor: Refer to your vehicle’s specifications to select the appropriate resistor value. Using the wrong one can lead to sensor or ECU damage.
- Install with Precision: Locate the MAP sensor in your engine bay, ensuring a safe and secure installation of the resistor in the circuit.
- Safety First: Prior to any work, disconnect the vehicle’s battery for safety.
- Multimeter Testing: After installation, use a multimeter to test the voltage signal from the MAP sensor. Ensure it falls within the specifications listed in your vehicle’s repair manual.
Method 2: Cold Air Intake
Replacing the stock air intake with a cold air intake system draws in colder air from outside the engine compartment. Colder air is denser and richer in oxygen, potentially enhancing performance and fuel efficiency.
Cold Air Intake Installation:
- Locate the Stock Air Intake: Identify the stock air intake system in your engine bay.
- Remove Stock Intake: Carefully remove the stock air intake system, which may involve loosening clamps and disconnecting hoses.
- Follow Manufacturer’s Instructions: Install the new cold air intake system following the manufacturer’s guidelines, ensuring all components are securely connected.
- Safety Reminder: If you disconnected the vehicle’s battery during installation, reconnect it once the process is complete.
Method 3: Tuning Device
Tuning devices enable you to adjust your ECU’s settings, including modifying the air intake data that the ECU receives. This can lead to performance and efficiency improvements.
Tuning Device Installation:
- Procure a Suitable Tuning Device: Acquire a tuning device compatible with your vehicle.
- Follow Manufacturer’s Instructions: Adhere to the manufacturer’s instructions for installation and configuration.
- Adjust Air Intake Data: Use the tuning device to adjust the air intake data as desired.
- Reconnect Battery: If you disconnected the vehicle’s battery during installation, reconnect it after installing the tuning device.
What to do after MAP Sensor Trick?
After performing a MAP sensor trick, a series of crucial steps should be taken to ensure the modification’s effectiveness and the safety of your vehicle. Start by testing your vehicle, paying attention to its behavior during a test drive and ensuring there are no unusual signs of engine trouble or warning lights.
Monitor engine parameters, using an OBD-II scanner or tuning device to verify that sensor readings, including the MAP sensor, fall within expected ranges. Fine-tune your modification if necessary to optimize performance and fuel efficiency.
Check for error codes and clear any that may have been triggered. Continue with regular vehicle maintenance and inspections. If you encounter issues or warning lights, consult a qualified mechanic.
How to test a MAP sensor?
Testing a MAP (Manifold Absolute Pressure) sensor is crucial to ensure that it is functioning properly. Here’s how to test a MAP sensor:
What You’ll Need:
- Multimeter: A digital multimeter is necessary for measuring voltage and resistance.
- Service Manual: Consult your vehicle’s service manual for specific values and procedures, as they may vary by make and model.
Steps to Test a MAP Sensor:
- Safety Precautions:
- Ensure the engine is turned off and has had time to cool.
- Disconnect the negative terminal of the vehicle’s battery for safety.
- Locate the MAP Sensor:
- Find the MAP sensor in your engine bay. It’s typically located on or near the intake manifold.
- Visual Inspection:
- Examine the sensor and its wiring for any signs of damage or corrosion. If you spot any issues, they should be addressed before further testing.
- Measure the Supply Voltage:
- Set your multimeter to measure voltage in the appropriate range (often 5V).
- Locate the reference voltage wire (consult your service manual for the wire’s color and location).
- Connect the positive lead of your multimeter to this reference voltage wire and the negative lead to the vehicle’s ground (often the battery’s negative terminal).
- With the ignition in the ON position, you should read approximately 5 volts. If the voltage is significantly lower or higher, there may be an issue with the reference voltage circuit.
- Check the Signal Wire:
- Set the multimeter to measure voltage (often 1-5 volts).
- Locate the signal wire (again, refer to your service manual for color and location).
- Connect the positive lead of your multimeter to the signal wire and the negative lead to the vehicle’s ground.
- Start the engine and let it idle.
- The voltage reading should vary as you increase and decrease the engine RPM. If the voltage reading remains steady or doesn’t respond to RPM changes, the MAP sensor may be faulty.
- Measure Resistance:
- Set your multimeter to measure resistance (ohms).
- Disconnect the MAP sensor from its wiring harness.
- Place the multimeter’s leads on the terminals of the MAP sensor.
- Consult your service manual for the specified resistance values. If the actual resistance deviates significantly from the specified values, it’s an indication that the sensor is faulty.
- Clear Error Codes:
- If you’ve been dealing with MAP sensor issues, use an OBD-II scanner to clear any error codes that may have been generated.
- Reconnect Battery:
- Once you’ve completed the testing, reconnect the negative terminal of the battery and start your vehicle. Ensure that it runs smoothly without any warning lights.
If your testing indicates a faulty MAP sensor, it’s advisable to replace it with a new one to maintain optimal engine performance and fuel efficiency.
Additional Tips and Considerations
- Thorough Research: Ensure you’ve conducted thorough research to select the most suitable method for your specific vehicle.
- Mechanic Consultation: If you’re uncertain or inexperienced, it’s advisable to consult a qualified mechanic before proceeding.
- Warranty Concerns: Keep in mind that modifying your MAP sensor could void your vehicle’s warranty. In case issues arise, repairs may not be covered under warranty.
In conclusion, the MAP sensor trick offers potential benefits in terms of improved performance and fuel efficiency. However, it’s crucial to consider the associated risks of engine damage and warranty implications. Seek guidance from experts, choose the method best suited to your vehicle, and weigh the pros and cons carefully. If you suspect problems with your MAP sensor, it’s often best to have it serviced or replaced by a qualified mechanic to maintain both performance and peace of mind.


